Monday, July 15, 2013

finished


So it's really easy to let too much time pass between posts and if I wait much longer, I probably wouldn't post the finished pictures of my dress.  I finished it just 2 days before the event so I tackled a bonnet (the yellow one), I put big pockets on the apron and made the corded petticoat.  It is pretty comfortable and not nearly as hot as people said it would be...everyone was hot but I was no hotter than anyone else and didn't really sweat while some others were drenched with sweat.


Here it is without the apron or bonnet.

 And with the apron and bonnet...see that black twig looking thing in front of me?  Well, I thought it was a twig and was about to kneel down but I realized it wasn't a twig, it was a big snake!!  We just looked at each other for a couple seconds until I regained my sanity and ran away.  

I love the dress!  It doesn't fit quite as it should, but that's ok.  It took about an hour of scrubbing the hem to get the red clay stains out of it, but there are no stains. :o)

I got a lot of compliments on my dress.

Thursday, June 6, 2013

seeing red

I have never been one to like bright colors in my clothes. A little is ok...but a bright red dress...a whole dress, that is way overboard.  But as I've worked on it, it's grown on me and I am confident I won't feel too out of place in it.  


Anyway, so far as the sewing goes, work had slowed a bit because all of the work left for the last few days has been handsewing.  Yep, no more machine work.  The shirt gets attached by hand and all the hemming and the hooks and eye...that's all that's left!  It's hard for me to believe that I am actually pulling this off.  

Each little pleat gets its own stitch to the bodice...well, two stitches, one on top, one at the piping.  I have the top row done and maybe 1/5 of the bottom row.  

Back detail

Front detail

I used to absolutely hate clothes!  When I got married, I really hated trying wedding dresses on.  All I knew was that clothes didn't fit right and I had no idea what I liked, what would flatter my body type or anything like that...so I just hated all clothes.  But now that I know what I like, I can see the appeal of buying such a special dress.  Though this dress looks nothing like a wedding dress, it reminds me of one.  Probably because it's so thick and doesn't fall flat.  

It will still take a lot of work, but I will have it done by the time trek rolls around.  I can't believe it!

Tuesday, June 4, 2013

Getting so close!

The bodice is done enough to look done.  Still needs hooks and eyes in the back, the sleeves need hemming and a little touch up hand sewing.  


+
The skirt in front is one that fits me...the skirt in back is 144" around and needs to be brought in to the skirt size.  The pattern taught me how to cartridge pleat to accomplish that goal.  It told me to measure and mark  1/4" all the way around and to draw a line 1/5" down and again 1/2" down from that.  Then on the top line, to hand sew in one hole, out the next, in one, out one and so on until I went all the way around...and then do it again on the lower line.  Then you just pull and it folds like an accordian.  


Pleated with 576 tiny pleats.  Amazing!


Only about 4 steps left!But they make take a while.

Thursday, May 30, 2013

Handcarts (and a sleeve)

My husband is also involved in the trek I'm going on and making the dress for.  When I got home from work last night, there were some handcarts in my driveway.  I was so excited that I flew down there to try one out.  My husband caught me playing. You can actually see my smile in this one.  I'm such a geek. lol

The other three that were in the driveway were just wheels on bare metal frames.  Adam and the person in charge of Trek were going to build the boxes for those.  They worked all evening on it.


They finished all three boxes but none are attached yet as they didn't have the right kind of metal tapping screw.

They actually bought the wheels from a company who makes them for covered wagons and are very good quality.

And while they worked on those, I worked on my dress.  The three sleeve pieces are finally finished (except the hemming of the sleeve edge...I'm waiting until it's attached to the dress so I get it right).

Tuesday, May 28, 2013

I tried it on!

I hope you had a great Memorial Day.  We had a very busy, tiring but good day.  We woke up early and with the help of 8 or 9 church friends, we were able to saw down our neighbor's tree.  A giant chunk of it had fallen in a very bad storm we had last week.  She's a single mother of 5 and couldn't afford to do anything about it.  We mulched what we could and cut the branches into firewood.  The trunk is still in her yard (we can't do anything about that but at least she and we don't have to worry about the damage the rest of the tree falling would have.  Took 5 hours.  Well, actually, it's not done as there is a large pile of branches sitting in our yard but people were too exhausted to continue.  We finished at 12:45.  We had a gang of people coming over at 1 for a bbq lunch.  We were planning on eating outside under that giant tree and its shade...but there was no shade anymore.  So we just ate inside.  

My mother-in-law, brother-in-law and his family, neighbors who are like grandparents to my husband and his siblings and a family of family friends came.  Their 16 year old daughter was in a serious car accident 3 months ago.  The doctors didn't think she'd make it.  She had a broken eye socket, brain injury, broken ankle, broken back and lost several feet of her intestines.  She was in a coma for 5 days.  But she is recovering quite nicely. She's fairly traumatized from her experience and is finding it difficult to cope with her new reality but was in good spirits during the visit at least.  They are a neat family.  

After the visit I managed to get my house back in order, go weed in the garden a little and then work on the sleeves of my dress a bit.  

The bodice is not finished yet.  It still needs piping around the waist and the arm holes, the back needs to be hemmed and have the hooks and eyes added, the side/front panel seams need to be handstitched in the ditch to the lining, and the neckline will need hemming.  It is done enough that I was able to finally try it on though and to my relief, it does fit!

The unfinished back

I love these lines!

Finally, it's on!  (It was midninght and I was falling asleep but had to finish it enough to get it tried on.)

So now I am moving on to the sleeves even though I'm not quite finished with the bodice.  The sleeves, while they don't have lining, will be thick since there are three sleeves stacked on top of each other in varying lengths.  

This is the macheron (the cap sleeve).  It gets three deep tucks and each tuck will have piping on the bottom of each tuck. So I'm doing basting stitches to make the folding easier.

Since the pattern has dropped sleeves and I had no idea how low the drop was, I couldn't tell if I would need to add length to the sleeve or not.  So now that I was able to try on the bodice, we pinned the sleeve to it to check.  I added 4 inches which will give me the length I need plus hemming room.  The black piping is where it ended before my addition.  The piping will make it appear intentional, I hope. ;o)  And the oversleeve is in place.  Just need a mancheron.  

Thursday, May 23, 2013

more of the bodice

So work continues on the dress.  I recently had to unpick a lot of work because I did it wrong.  So I am finally back to where I feel like I'm making a bit of progress.  


Here are all the gathers at the bottom of the front.  I hand stitched the gathers even though it wasn't in the instructions because if one of them broke, it would ruin the whole look.  It went pretty quickly. I did it through the backside so you can't see it on the front side.

The shoulders called for gathers but I toyed with pleats and eventually went back to the gathers because they're easier.  As of right now, this piece is waiting to be sewn to the lining.

The back pieces have gathers at top and bottom as well.  They got resewn to the lining last night.  This dress has the closures in the back so I will definitely need help getting dressed.  

Finally touched the sleeves last night.  There are 6 seperate sleeve pieces (3 for each side).  A sleeve (full length), an oversleeve (like a 3/4 sleeve) and a mancheron (a cap sleeve of sorts).  Each starts at the shoulder seam so that's gonna be a heavy sleeve! lol  Guess what...there are more gathers in the sleeves!  They sure liked their gathers!  I got the gather stitches in both sleeves and over sleeves last night but haven't gathered them as of yet.  The mancheron is kind of fancy...no gathers, just a few tucks and lace.  I sewed one of the sleeves up to try it on last night.  I have big hands so I wanted to make sure my hand could fit through the opening.  It did.  I need to lengthen the sleeves as my arms are also longer than the average women's apparently.   The other area of concern for me is the area in front of my armpit.  I feel like the incredible hulk in a lot of women's shirts because it's so tight at the armpit that I can't move very well.  It felt like it would be ok...but once it's attached to the bodice (which I haven't been able to try on yet) will be the true test.  

Thursday, May 9, 2013

Pioneer dress - working on the bodice front

I sure picked a complicated dress after having not sewn a piece of clothing in coming up on 20 years now. My MIL is helping me translate the instructions which the company who made the pattern stated up front that they would be confusing for anyone not familiar with historic clothing construction...yeah, that'd be me!  I will be making the corset too but I don't have enough time before this dress is needed next month.  The dress I am making is the top one on the right.  The bodice is just amazing to me!  


You can see the bodice much better in the illustration below. Lots and lots of gathering in this one.

Here's the front bodice lining.  I've never done darts before and I was so proud of these.  They have channels sewn into them for the boning that wasn't added yet when I took this picture but has since been added.

The actually bodice is four pieces not counting the lining.  This is two pieces sewn together and there are two small side pieces not sewn in yet in this picture.  If you look closely, you can see my silhouette.  This thing is huge...but it won't be for long.  This is going to be getting the gathers. (It was midnight and I was exhausted, excuse the blank stare.)

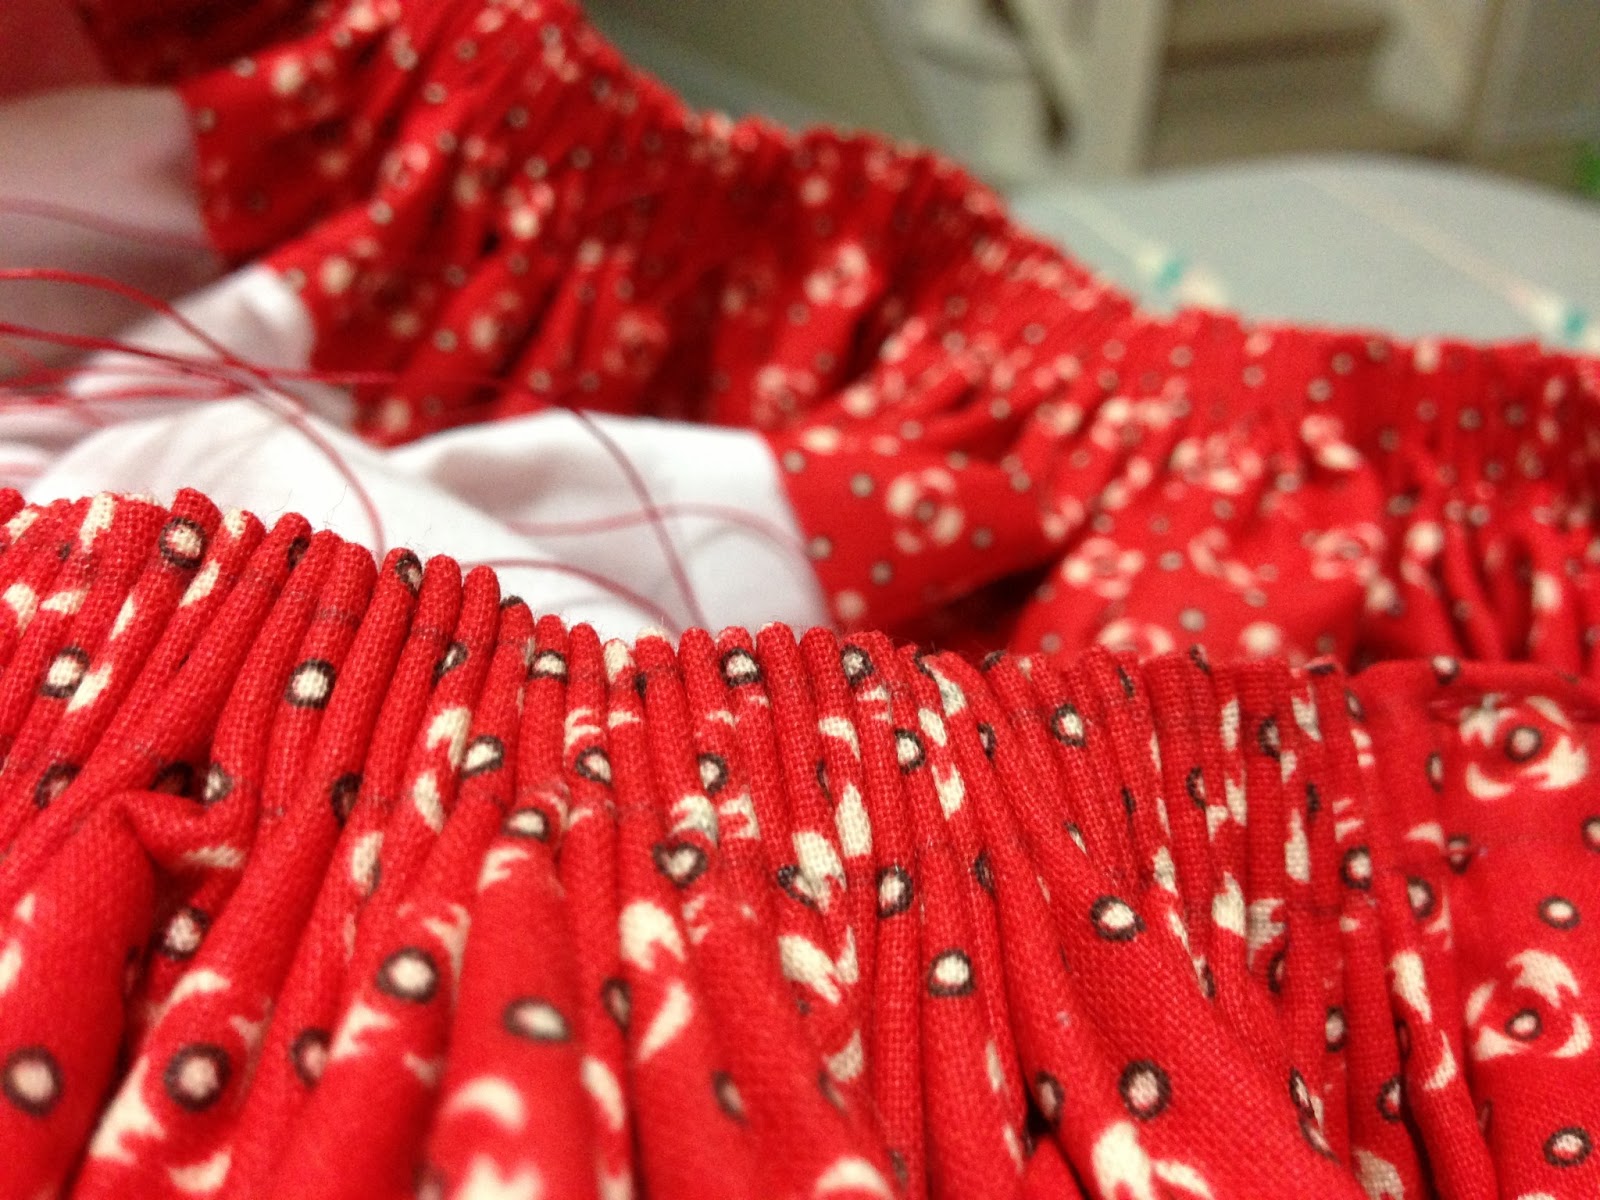
They have you sew in the gather stitches but before you gather, they have you sew on the side panels.  That was a little frustrating because I managed to catch the gathering threads in the stitches.  But after taping the threads to the fabric, all went well.  7 gather stitches across the bottom.  

So with that sewed, I had to pin the bodice to the lining.  As you can see, it's a poor fit. This is where I stopped tonight.  Now the fun begins...gathering everything until the bodice is the same size as the lining.  The shoulders have gathers across the top as well.

My MIL leaves me with homework to do before she comes over next.  My homework this time is to do all the gathering, unpin the bodice and lining, pin them back together with wrong sides together and sew everything together except for at the bottom.

I'm thinking 4 weeks will be pushing it!  My MIL says we can do it...I have to have faith in her experience since mine is lacking.  But once this dress is done, I really need to come up with a costume for Adam.  He's not at all interested in historical correctness though so I am not either, for his costume.  We're doing trek next month, in case I didn't mention it.

It's been a little frustrating, a lot confusing but overall, a great experience.  I am learning a lot and I am so excite for this dress!  It's going to put my other pioneer costumes to shame.  I will be the most accurately dressed on trek, I am sure of that.


Friday, May 3, 2013

Mini ocean


Here's a mini painting.  It's 2"x3".  It's nice to be able to do one this size because I am often short on time but want to get a painting done.  This size is easy for me to do quickly.  I can't mess with too much detail.  


Sunday, April 28, 2013

learning to paint

In the middle of March, I decided I wanted to learn to paint.  It all started at the doctor's office when I was waiting for the doctor.  I was bored so I did a sketch.  I love drawing but have never sketched.  I really enjoyed the freedom of not having to be perfect and decided that I could finally have that attitude with painting as well.  I started with watercolors.  Tucker was my willing model.  It makes me laugh.  


So since I had so much trouble with the watercolors, I tried acrylics.  I was quite pleased with the outcome.

So I tried a tutorial for an acrylic sunset.  

But then I decided I don't like being beat so I wanted to revisit watercolors.  I haven't touched acrylics since...it's all been watercolors.  I began by following tutorials I found on YouTube


This one I did while on vacation in the Smoky Mountains the last week of March.  It was done while looking at the mountains from our room while I waited for Adam to wake up.  My mountains have definitely improved from my first attempts.


I have decided that night skies are a lot of fun to do and I can't wait to do more.  Someone asked me if I wanted to sell this one.


I've been trying lots of different techniques.  They range in sizes from 2"x3" - 9"x12".  I really don't have the time to be doing so much painting but I can't help myself.  I am getting less sleep than usual as a result.  But I can see that all my practicing is, indeed, helping me to improve which only makes me want to paint more.  

People keep asking me what I do with my paintings.  Right now, they're just in a pile.  Aside from framing a couple of my favorites, I don't know what I would do with them.  


Related Posts with Thumbnails