Thursday, December 30, 2010

Sandwich on cast iron and a weed on the broccoli

I have been reading this book about this couple who lived in the Canadian wilderness from the 40's-60's. They talked some about the wild foods they ate. This wasn't one of them that they talked about eating but it inspired me to get back outside and see what food I could find to eat. I noticed in the fall that we had garlic mustard plants growing in the side yard so I went back to see if they survived the snow we had this week. They did! There's not much left but it's still there so I grabbed a handful.

Garlic mustard plant has a garlicky flavor/smell to it though it's much more mild than garlic. I really could have used more than I got but I didn't want to use it all at once. I'll get back to that in a second.

On Christmas, Lanette told me about this cast iron griddle/grill that they had for years but they weren't sure where it came from. They never used it so were getting rid of it. I said, "Oh, give it to me!" So she handed it over thankful to have it out of her house...and I'm thankful to have it in mine! I made use of it today for my sandwich which I have named "ham & cheese pannini with a twist". The is the grill side, the other side is smooth but you've got to have the marks for a pannini. I would have liked to have had a bacon or steak press to squish this sandwich down but I don't have one so I left it its original size.

So, back to the garlic mustard...or is mustard garlic....I can't quite remember. Anyway, back to the plant. I cut it up into thin strips and threw it in a pan with a little bit of butter. After a few minutes, I threw in some cooked broccoli. I let that cook for a few minutes while the cheese was finishing up melting on my pannini.

The twist on the sandwich is that it has apple butter and sliced apples in it. I've had it before with the apples but never with the apple butter. I really liked both the sandwich and the broccoli. I was a little worried about the garlic mustard because the wild greens I've tried so far are extremely bitter but this wasn't at all. I'll definitely be using it again. But I probably only have enough for one more dish. Then I'll have to wait until spring/summer for more to grow.

Monday, December 20, 2010

Christmas decorations finally out

I had brought out the Christmas tree into the living room. I even got the boxes of ornaments/decorations out of the attic but the two never met. Finally, while I was home sick for 4 days I decided to tackle it. It's not very festive but I had a "Hoarders" marathon while decorating. I couldn't find any Christmas movies. And since I was watching hoarders I had to weed through my Christmas stuff. Our first Christmas after we were married, I went crazy at the dollar store, the dollar general, family dollar and thrift stores collecting Christmas stuff. I bought a bunch of cheap decorations. I had them set up on the large entertainment center we had at the time as well as filling up the china cabinet which we also no longer have. So most of the stuff never came back out to play. I went through everything before moving out West and got rid of about half of it. This time, I got rid of all but a few things that I had bought that year. They just didn't appeal to me anymore. It doesn't bother me that there's not many decorations like it seemed to that year.

The dining room chandelier. I added the teddy bear after I couldn't find a spot for him that I felt was safe from Tucker's grasp.


I love my nativity set. It looks a lot like the Willow Tree stuff but it's just a set from Walmart. I waited a few years to find the right one. The sign was a gift from Valerie many years ago.


The angel and the Mary, Joseph and Jesus figurines were from the dollar tree from our first year. I was going to get rid of them too since their eyes are a little creepy but decided to go ahead and keep them.


The dining room table. I sure could use a Christmas table cloth...maybe by next year.


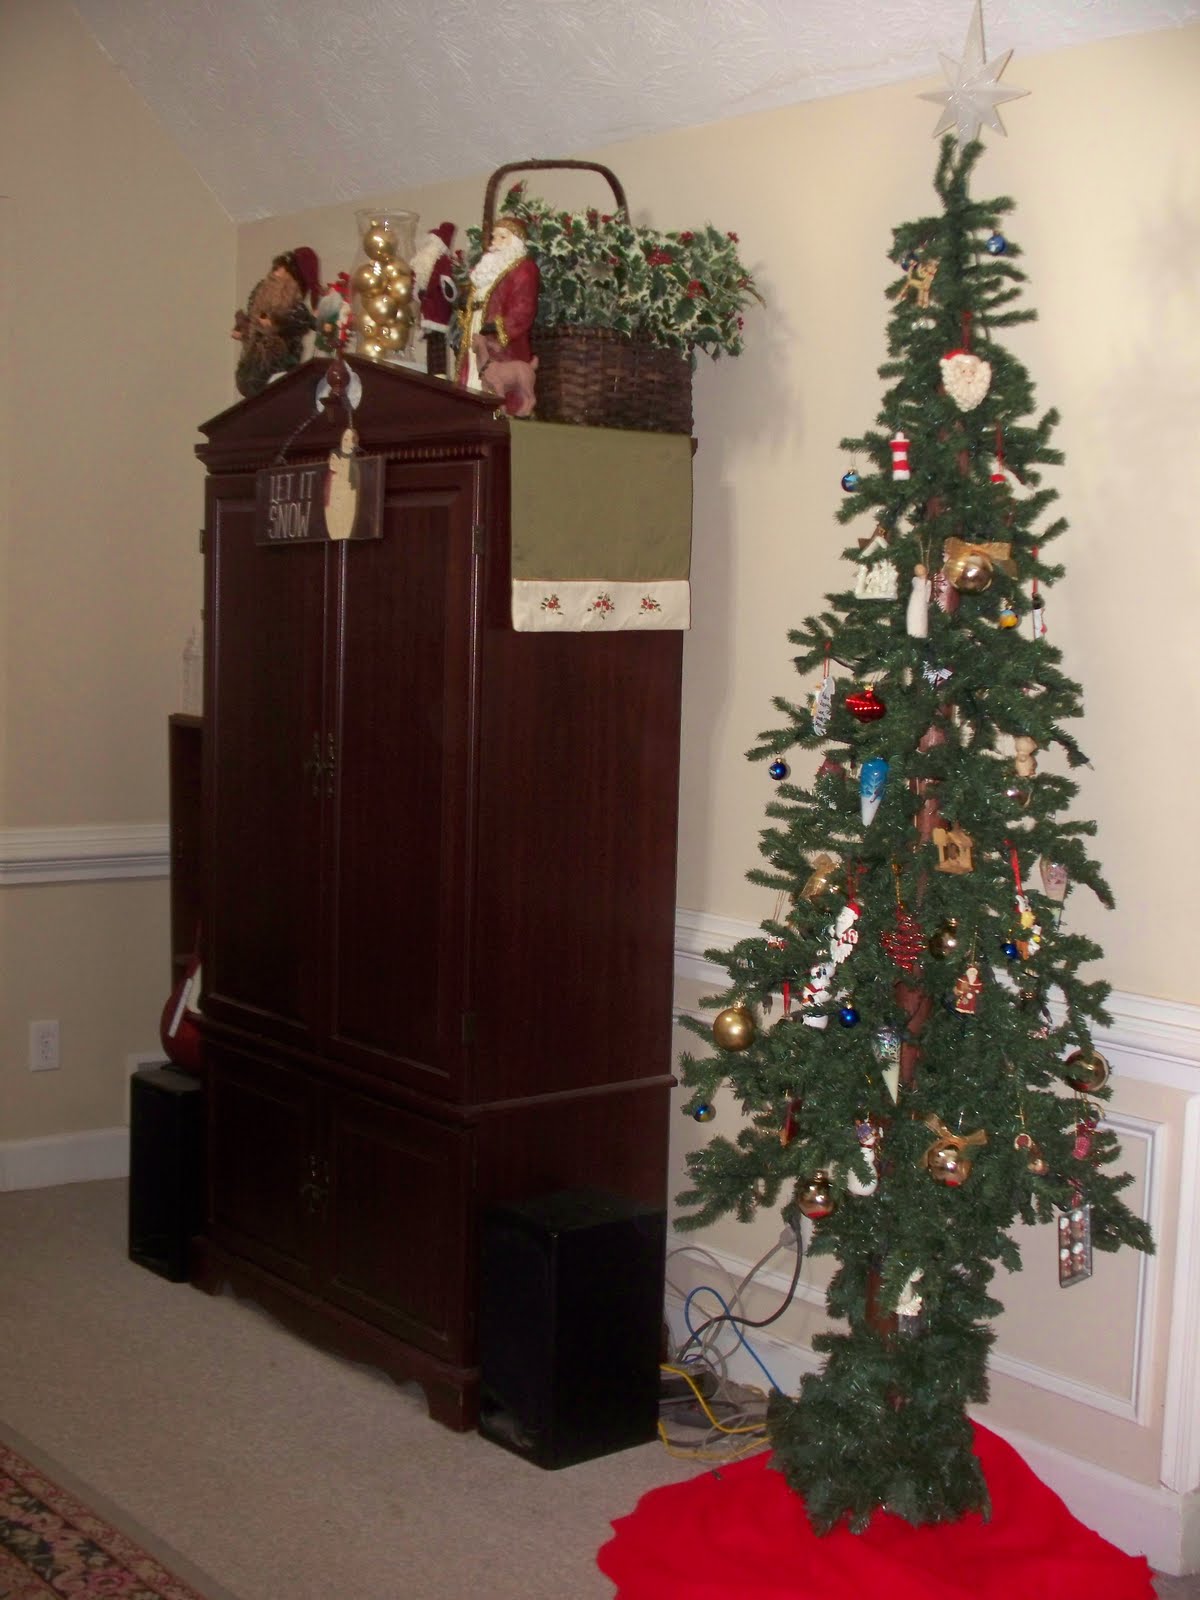
The entertainment center. This is what's lfet of my Santa collection. There used to be a ton. But I decided to just keep my favorites.


And then of course, there's a tree. I found this tree at a thrift store. It's the kind that has a lodge pole in the center and all the branches are glued in place so there's no assembly. :o) Besides that, I just love it. It's compact, I like that! Adam thinks it's a Charlie Brown type tree. I usually have berry garland on it but I wasn't able to find the box with it in it until after I had already put the ornaments on so I used it elsewhere in the house (in the pine garland around the front door and on the chandilier.


Our first Christmas, I decided to paint some little ornaments with scenes from some of the things we had done together. Some are much better than others but it's fun to see them because it reminds us of that year. I had plans on continuing it every year but it never happened.

Sunset while on a dolphin cruise in Hilton Head, SC.

Well, this one is hard to tell but it's the mountains with fall colors we saw while driving through North Georgia.

This is supposed to be Hickory Nut Falls where Adam asked me to marry him.

This is Chimney Rock in North Carolina.

The Hilton Head lighthouse.

Hilton Head beach.

St. Simmons lighthouse.

This one is my favorite, it's a racoon that followed us around a nature reserve in Southern Georgia. He actually walked with us like a dog. When we got to the car, he jumped onto the car and wouldn't let us in. He wanted to be fed and he hissed at us when we got close to the car. I finally was able to get in while Adam distracted him and I got a bagle and threw it out. When the racoon ran to the bagel, Adam hopped in and we took off real fast before he hopped back on the car.

It still doesn't seem possible that Christmas is this week. It has snuck up on me, no matter how many times I talk about it or think about it, or prepare for it, it just doesn't seem close yet.

Merry Christmas! I hope it's full of family, love, making memories and sharing with others.

Friday, December 17, 2010

Something new

I haven't been updating the blog lately because it feels like I haven't done anything interesting. But, I recently tried something I've been wanting to do for a while. I found a recipe for sprouted bread online. The only ingredient is sprouted wheat berries. I've bought the Ezekiel bread before which is sprouted grains and nothing else. It tastes slightly different than regular bread but much better for you since it doesn't have any chemicals in it. But a loaf of that bread is $5-6. Since I'm always looking for ways to do things for cheaper, I decided to take on the challenge.

I do have a seed sprouter but it's not nearly big enough for grains so I came up with this:
It's my mixing bowl, a spatter screen and a plastic cookie sheet lid to catch any dripping water. You have to soak the berries overnight then drain. Rinse and drain them 3 times a day for 3 days. Then they're ready for making bread.

I loaded them in the food processor and processed them. I noticed that I didn't particularly like the scent the crushed berries gave off. Then I dumped them into the smallest loaf pan I have. It just barely fit inside the crock pot. The recipe said to cook it in the crock pot for 8 hours. So I put them in just before going to bed.


I was so excited to have a slice with my breakfast the following morning. I opened up the crock pot and the smell hit me. Not a good smell. It was very soggy, not like bread at all. I took a tiny bite. It was disgusting! I'm sad about that. I want to give sprouted bread another chance but next time I think I'll go with a more traditional risen bread with flour made from dehydrated sprouted wheat.

Monday, November 22, 2010

Making a photo candle


This is a super simple craft that I learned back when I was really into scrap booking. Last time I used a white candle. This time, I couldn't find the right size candle in white or cream so I bought a red one. Turns out that the color bleeds right through the paper so that was a dud. I tried using a real photograph, thinking it wouldn't bleed through but I ended up melting part of the picture. So moral of the story is, you have to use cream or white. LaWanda found one in her supplies in cream, otherwise I wasn't going to be able to make this for Maria's wedding shower.

To make a photo candle, you need:
a copy of a picture on regular copier paper
4 pins
wax paper
an embossing gun, heat gun or hair dryer
embellishments (optional)

You take your picture and a piece of wax paper about the size of the picture, maybe 1/2 margin on each side. You line up the picture on the candle where you want it, then lay the wax paper on top of that. For a cream candle, you need to trim the picture so no white is showing so there will be little hole marks in your picture but if you use white, you can leave a little extra paper for the pins and you won't be able to tell pins were ever used. Pin the wax paper/picture to the candle.

Take your heat gun and use it to melt the wax on the wax paper and the candle just a little bit as well. Push it down with your hands to make sure it has a good seal.

Let it dry for a couple of minutes then peel off the wax paper.


Your candle is done now but you can add ribbons or other embellishments if you wish. For this one, I used a jute ribbon and a small charm that says "Head over heels". (shown in the first photo)

Super simple gift and fun to make too!

Tuesday, November 9, 2010

Chestnuts

I first noticed these spiky balls on a tree in the spring.


Then I forgot about them until a few weeks ago when I saw some on the ground under the same tree. I wondered what was inside them so I grabbed one, like you would an apple, to pluck it and take it home where I would open it. Turns out, those spikes are hard and like hypodermic needles! I let go immediately. I thought I could get home with it cupped ever so gently in the palms of my hands. I took 5 steps before I had to drop it. So I stomped on it and these seriously deflated looking things came out. I found out they are chestnuts (well they would have been had they actually developed). I asked the owners if I could pick some to try them out. They said I could help myself. I didn't have gloves or anything so I waited a few days. When I went back they said that they weren't able to find any good chestnuts and they weren't sure what went wrong that year. They said I could still help myself but I decided it wouldn't be worth my time. She took me on a tour of their garden and gave me 2 eggplants and 3 jalapenos. I got a taste of stevia as well. It really is quite sweet! They have a fig tree and she said I could help myself in the summer time to those as well. She was a very nice lady!

Well, fast forward, I found this pecan tree on someone else's lawn. When we walk by I grab the pecans that are sitting on the sidewalk. I chat with the owner occasionally, whenever he's outside as we walk by. One evening, he was out chopping firewood for his wood stove. I asked him about the pecans and he said that they had already picked 42 pounds and I could have as many as I wanted. :o) I went back the next day for those. He mentioned he had a chestnut tree back near the barn and they never eat them so if I wanted to try some, to go ahead.

I've never had chestnuts so it's worth an experiment. The squirrels had already gotten most of the chestnuts. Note to self: collect chestnuts when they start falling, not a few weeks later. So I gathered the few I was able to find. I had to move the spiky hulls around with my shoes. I really didn't get many but I did get enough to at least find out if I like them or not.

Here's the tree...not a great picture since the sun was setting.


Here's what I collected. There's those MEAN hulls! I am learning alot about how nuts grow this year. I would never want a chestnut tree or a walnut tree on my property...but I would welcome a pecan tree.


This chestnut had the most personality. It was difficult to get out of the hull and it wanted to keep this mohawk.


Food is fun! :o)

Wednesday, November 3, 2010

sourdough

I don't know what it is with my breads lately but they just don't want to rise like they used to. And not just the sourdough but with yeast as well. I need to go back to my original recipe that really rose well and see if I have any luck with it. The flavors are still good but I would really like a fluffy bread again.

Both the bread and the biscuits look like whole grain but I only used white flour in them. The sourdough sponge is made from rye flour though so I guess that's where the color is coming from. It's not that I didn't want to use whole wheat flour but I had none. I had to locate a good container for my wheat grinder since it is gone. I finally found one so I hope to be pulling it out and using it soon. :o)

Sourdough Flax Seed Bread


2 cups active sourdough starter
2 tablespoons sunflower seeds (optional)
1/4 cup flax seed (optional)
1 tablespoon poppy seed (optional)
4 1/2-5 cups unbleached white flour
1/2 cup flax seed meal
1 1/4 cups cold bottled water
1 1/2 teaspoons salt
3 tablespoons olive oil
3 tablespoons honey

Directions:

1 (Optional) Put the sunflower seeds, flax seeds, and poppy seeds in a hot, clean, dry skillet and stir them. Let them roast, with frequent stirrings, until they become fragrant. Be careful to make sure they don't scorch! Toasting the seeds makes them - and the bread - much more tasty. You may also roast the seeds in a 375F oven for 5 to 10 minutes.

2 Mix the active starter, water, oil and honey together. (I use my Kitchen Aid with the dough hook for this process.).

3 Add the (optional) seeds.

4 Stir in the flax meal.

5 Add the salt and then stir in the flour one cup at a time until the dough is too thick to stir.

6 Pour the dough onto a floured work surface (or turn up the speed on your Kitchen Aid) and knead until the dough is resilient. The dough is a rather sticky dough; it's important not to over-flour the dough.

7 Once the dough is well kneaded, turn it out into an oiled bowl, turn and cover.

8 Let it rise until doubled.

9 Deflate the dough, knead briefly, cut and shape into rough loaves.

10 Let the dough sit, covered, for 30 minutes, then shape into final loaves.

11 Let rise, covered, until doubled.

12 Preheat the oven to 375°F.

13 Bake 30 to 45 minutes.


Sourdough Angel Biscuits


1 cup sourdough starter (active and bubbly)
1 teaspoon sugar
1 teaspoon dry yeast
2 tablespoons lukewarm water
4 tablespoons shortening
1/2 teaspoon salt
1 teaspoon baking powder
1 1/4-1 1/2 cups all-purpose flour
1/4 cup melted butter or 1/4 cup margarine

Directions:

1 Measure sourdough starter into mixing bowl.

2 Add sugar.

3 Dissolve yeast in warm water.

4 Add to starter.

5 Cut shortening into mixture of salt, baking powder, and flour until it resembles coarse cornmeal.

6 Add to starter mixture, stirring well with a fork.

7 Turn out onto lightly floured surface and knead gently, adding more flour if necessary.

8 Roll dough out to about 1/2 inch thickness and cut with biscuit cutter.

9 Dip in melted butter and place in a greased cake pan with edges touching.

10 Cover with a cloth or plastic and set in a warm place to rise for 45 minutes to 1 hour.

11 Bake at 400 degrees F for 20 to 25 minutes or until golden brown.

Note: I found that they didn't rise mush so I would suggest not rolling them so thin. Seems odd to me that with three rising agents that these things didn't rise...

I definitely like the bread better than the biscuits... and the bread was about the same amount of work, just more waiting time is all.

Apple Bacon Pie

As weird as this sounds, it sounded really good to me. So I went ahead and made it. I followed the recipe and it was really good! I would only use 4 apples next time instead of 6. It has been my breakfast every morning this week. This is the second time I've made pie crust. It's so easy, I had forgotten that.


Bacon Apple Pie

1 double pie crust recipe - home made or store bought
4-6 apples, peeled and sliced into 1/4 inch thick pieces
Lemon juice - about a tbs
3/4 lb of bacon, smokey and salty
1/3 cup white or brown sugar
1 tbs cinnamon plus other spices, if you would like
1/4 tsp salt
4 tbs butter

* Preheat oven to 350 degrees. Chop the bacon into 1/4 inch chunks and fry until quite done but not crispy. Remove from pan with a slotted spoon and drain on paper toweling. Reserve grease for another use.

*If using home made pastry lay half of it into a pie pan and roll out and then cut the other half into strips to use for lattice. If using store bought pastry defrost it completely and then turn one of the pans worth out onto a cutting board. Roll the pastry flat with a rolling pin and slice into strips for the lattice top.

* As you slice the apples toss them with lemon juice to keep them from browning. When you are ready to assemble the pie drain the apple of any extra lemon juice and then toss with the sugar, cinnamon and salt. Some recipes call for a tablespoon of flour to get tossed in here too. I don't use it but you might like it.

*Start to layer the apple slices into the bottom pie crust. When one layer of spiced apples is in sprinkle some of the bacon bits on top. Add another layer of apples, more bacon and then a third layer of apples and bacon. You can pile the apples quite high in this pie, tucking them in and laying them well to form a solid mound. Dot the top of the pile of apples with butter cut into pea sized pieces. Sprinkle some sharp cheddar cheese over this if you are being really decadent.

*Follow these instructions to create a lattice crust on top of the pile of apples. Crimp all the edges well and place the pie pan on a baking sheet and then place in the preheated oven. Bake for about 45 minutes or until the pie is very fragrant, you can see bubbly juice coming up through the lattice crust and the crust itself is nicely browned. Poke the pie with a knife to make sure the apples are tender then remove the pie and let it cool a bit. All pies are just as good at room temperature or cold and it will hold together better if you let it cool a bit. It will be worth the wait.
Related Posts with Thumbnails