Showing posts with label dessert. Show all posts

Wednesday, March 14, 2012

diet update and a yummy sugar free/dairy free ice cream

So here's a little update on my diet. It's still evolving and probably always will be. I had given up white flour and sugar back in August. I didn't expect that I would feel so much better after giving it up. I knew it would be good for me long term but I didn't realize what a difference it would make in the present. Well, I fell off the band wagon when I went to visit family in Sept./Oct. I finally got the will power up to give up sugar again in early December. But I wasn't ready to give up the flour again. It is just too hard.

I didn't really notice a difference when giving up sugar (but have stuck it out these few months since). In fact, by late December, during all the days of festive eating (minus sugary stuff), my body was overloaded by everything and I think was trying to self destruct! I was in so much pain! Literally, every time I took a step, it felt like my body was going to explode. Walking the dogs was really a form of torture for me! That's when I decided I needed to get serious about finding out what was giving my body such a hard time. My first thought was wheat, or gluten. Since I had given up white flour, and really restricted the amount of wheat flour products I was having too and that's when I felt good, it made sense.

I didn't give up white or wheat flour right away. I just tried to switch to more veggies while weaning myself off flour. For a month, I did that and logged my food and how I felt. This will be for the GI doctor later (still doing that most days). Things got a bit better but there was still a lot of pain and discomfort...some days were worse than others. Then after a month (and a few days since I was having a hard time saying goodbye to wheat) I went gluten free.

It's been difficult. I really love bread and that gluten free bread out there is not bread. I really crave bread sometimes! Fresh from the oven, still steaming, with some butter and apple butter. Oh yes, this is the stuff dreams are made of. ;o) But I made the switch. And I have done pretty well, if I do say so myself.

I was hoping for more progress in my health improvement...and quicker too! But it wasn't as fast as last time or as pronounced. But I do definitely see an improvement! I am no longer in pain the vast majority of the time. I do still get really uncomfortable at times...and other issues I have been dealing with are not quite fixed. But overall, I feel so much better that I am willing to give up yummy bread forever to never again feel like I did, it's that much of a difference.

I still feel like I can improve more...the last of my symptoms can be taken care of. At least I hope so. So on Monday, I have also gone dairy free. It's a month long trial I'm doing. If it makes no difference, I will go back to consuming dairy since it's another thing I love. But if it helps, I will also cut it out.

It is difficult to be on such a restricted diet! But I do know there are still a lot of foods that I love that I can eat so I try to concentrate on that instead and not be too bummed when I learn yet another thing I like is now on my no no list.

In honor of that, I am a dessert person. It's unrealistic for me to believe I can go through life without indulging in a dessert every now and then. I have found a few things so far that I can eat and feel like I am not too deprived. Here's one of my most recent finds.

All it takes is a frozen banana, a scoop of almond butter (or peanut butter), a scoop of cocoa and some coconut milk. Oh, and a handful of ice cubes. I didn't really measure anything. Then I blended it up in my blender. The first time I made it, I made it with cream and it came out very silky smooth, like moouse. This time, with the coconut milk, it was more liquidy but same taste. Yum! So good and perfectly healthy!


A little update on Adam: He has given up wheat...not gluten, just wheat. He is allowing small amounts in things like soy sauce, salad dressing, things with maltodextrin, caramel coloring/flavoring, and other ingredient labels that gluten free people can't eat. He is hoping it helps him with his tiredness level. He says he will do it for a month and see how he feels before deciding either way. Crazy! I was shocked when he told me that. He lives on pasta and bread so it will be interesting to see him cope as he gets further along. He hasn't cut out sugar either so he can still have things like no bake cookies...he's been really thinking about that. lol Anyway, I hope he sees an improvement because it would be relly good for him to not be so tired all the time.

Tuesday, February 7, 2012

healthy cookies?

Well, I am not sure if these are technically healthy, they certainly aren't unhealthy...unless I ate a ton of them.

They're super simple to make, you don't have to bake them, they taste good...what's not to love? Oh, and the recipe is small enough that you don't have enough sitting around taunting you. It only makes 4 cookies and I halved it so I only got two cookies but that's fine because that was plenty to satisfy my sweet tooth.


Peanut Butter Oatmeal Cookies

12 pitted dates
1/2 cup old fashioned oats
1 tbsp reduced-fat peanut butter (I used Adam's crunchy peanut butter)

Place the dates in the bowl of a mini-food processor fitted with the chopping blade (I used my blender). Process until the dates are very finely chopped and stick together. With a spatula, transfer to a small mixing bowl. Add the oats and peanut butter. Using an electric mixer fitted with beaters or your hands, mix well.

Divide the mixture into 4 equal amounts. Shape each into a ball. Place one ball between two sheets of waxed paper. Flatten the ball to a 3" diameter cookie. Repeat with each ball. Serve immediately or stack between sheets of waxed paper in an airtight plastic container. Refrigerate for up to 5 days.

Makes 2 (2-cookie) servings

I just made the cookies in my hand, no paper wasted and it didn't stick to my hands at all. Yum!!

Monday, August 8, 2011

My brother's visit & pecan pie

My youngest brother is starting law school! He was moving cross country and stopped by here to stay for a night and have some dinner. He had a stressul trip with car problems but he's almost to his destination...then he can relax, knowing me made it. But school will keep him plenty buyy so not too much relaxing...not thaat he's done that much lately since he's been taking crazy amounts of credit hours at school and working full time. We visited, ate dinner, played a board game, ate dessert and visited some more until too late. We were both exhausted...both that night and in the morning. It was a good visit...pretty short though.


Chocolate chip pecan pie is his favorite so I made sure to make one for his visit.

He brought a box of goodies from my mom. It had my grandma's dishes in it. I've always loved these metal, enamel coated plates and bowls.


This is an afghan my other grandma crocheted for me as a baby and a dress I wore as a baby...it's hard to believe I was ever that small!


These granny squares are from my aunt. She gave them to my mom in the 80's and she never did anything with them so she passed them on to me.


And I didn't actually ask about this dish rag but I am assuming that the same grandma that made the afghan also made this. I love it!


Back to the pecan pie, The only items I had to buy was the eggs...and I always buy eggs anyway. I used some of the pecans I foraged in October. I really do need to use them up...some still taste fresh but others, not so much.

I streamlined my cracking process of cracking by sorting by size. That way, I only had to do a minimal amount of adjusting the nut cracker. It took a lot less time to crack them that way...but picking the meat out of the shells is always time consuming. (I got this really great nut cracker at a thrift store for $2 just a day after I learned what one looked like. I wouldn't have realized what it was and passed it up just a day before.)

This pie is a family favorite. Every Thanksgiving, we used to each get our own pie...that meant my mom baked at least 8 pies...but there were usually a couple other pies as well, like pumpkin and apple. I haven't had a pie to myself in years and it's too rich for me these days to eat a whole one. I ate one that night and kept a smaller piece for myself but packed the rest of it up and sent it with him.

Chocolate Chip Pecan Pie


3 large eggs, slightly beaten
1 cup granulated white sugar
1 cup Karo Light or Dark Corn Syrup
2 tablespoons margarine or butter, melted
1 teaspoon pure vanilla extract
1 1/4 cups pecans
1 (9-inch) unbaked pie crust

Preheat oven to 350F.

In medium bowl with fork beat eggs slightly. Add sugar, Karo, margarine and vanilla; stir until blended. Stir in pecans. Pour into pie crust.
Bake 60-70 minutes or until the middle is no longer jiggly.

Thursday, July 21, 2011

peanut butter filled cookies

Though Adam doesn't like chocolate cookies, I was craving some a few weeks back so I made some anyway. He wasn't excited about it but when he tasted it, he said they were good and has since requested them so I know this one is a keeper. :o)

Chocolate Peanut Butter Surprise Cookies


1 1/2 cups all-purpose flour

1/2 cup unsweetened cocoa

1/2 teaspoon baking soda

1/4 teaspoon salt

1/2 cup granulated sugar (plus more for rolling)

1/2 cup packed brown sugar

1/2 cup unsalted butter, softened

1 cup creamy peanut butter, divided

1 teaspoon vanilla extract1 egg

3/4 cup powdered sugar


1. Preheat oven to 375º F. Line a baking sheet with parchment paper; set aside.


2. In a medium bowl, whisk together flour, cocoa, baking soda, and salt. Set aside.


3. In the bowl of a stand mixer fitted with the paddle attachment, beat together sugars, butter and 1/4 cup of peanut butter until light and fluffy. Add the vanilla and egg, beating to combine. Stir in the flour mixture and stir to combine, blending well. Set aside.


4. In a medium bowl, mix together powdered sugar and remaining 3/4 cup of peanut butter until smooth.


5. Pull off a heaping tablespoon of cookie dough and flatten with your hands. Take about 1 teaspoon of peanut butter mixture and place it in the center of the chocolate dough. Wrap the chocolate dough around the peanut butter center, pressing to seal. Roll the cookie into a ball and roll the cookie in the sugar. Place cookies on the prepared baking sheet 2 inches apart. Using the bottom of a glass, flatten each cookie to about a 1/2 inch thickness.6. Bake in preheated oven for 7 to 9 minutes. Let stand on the baking sheet for 2 minutes, then remove to a wire rack.

Wednesday, July 6, 2011

patriotic cake

I was asked to bring a cake to a family dinner party this weekend. I quickly decided on making a patriotic cake. I was concentrating on trying to finish my cabinets this weekend so I cheated and went the boxed cake mix route and even bought the tubs of frosting too. It's so against how I like to cook but I felt it was necessary in order to get this cake done.

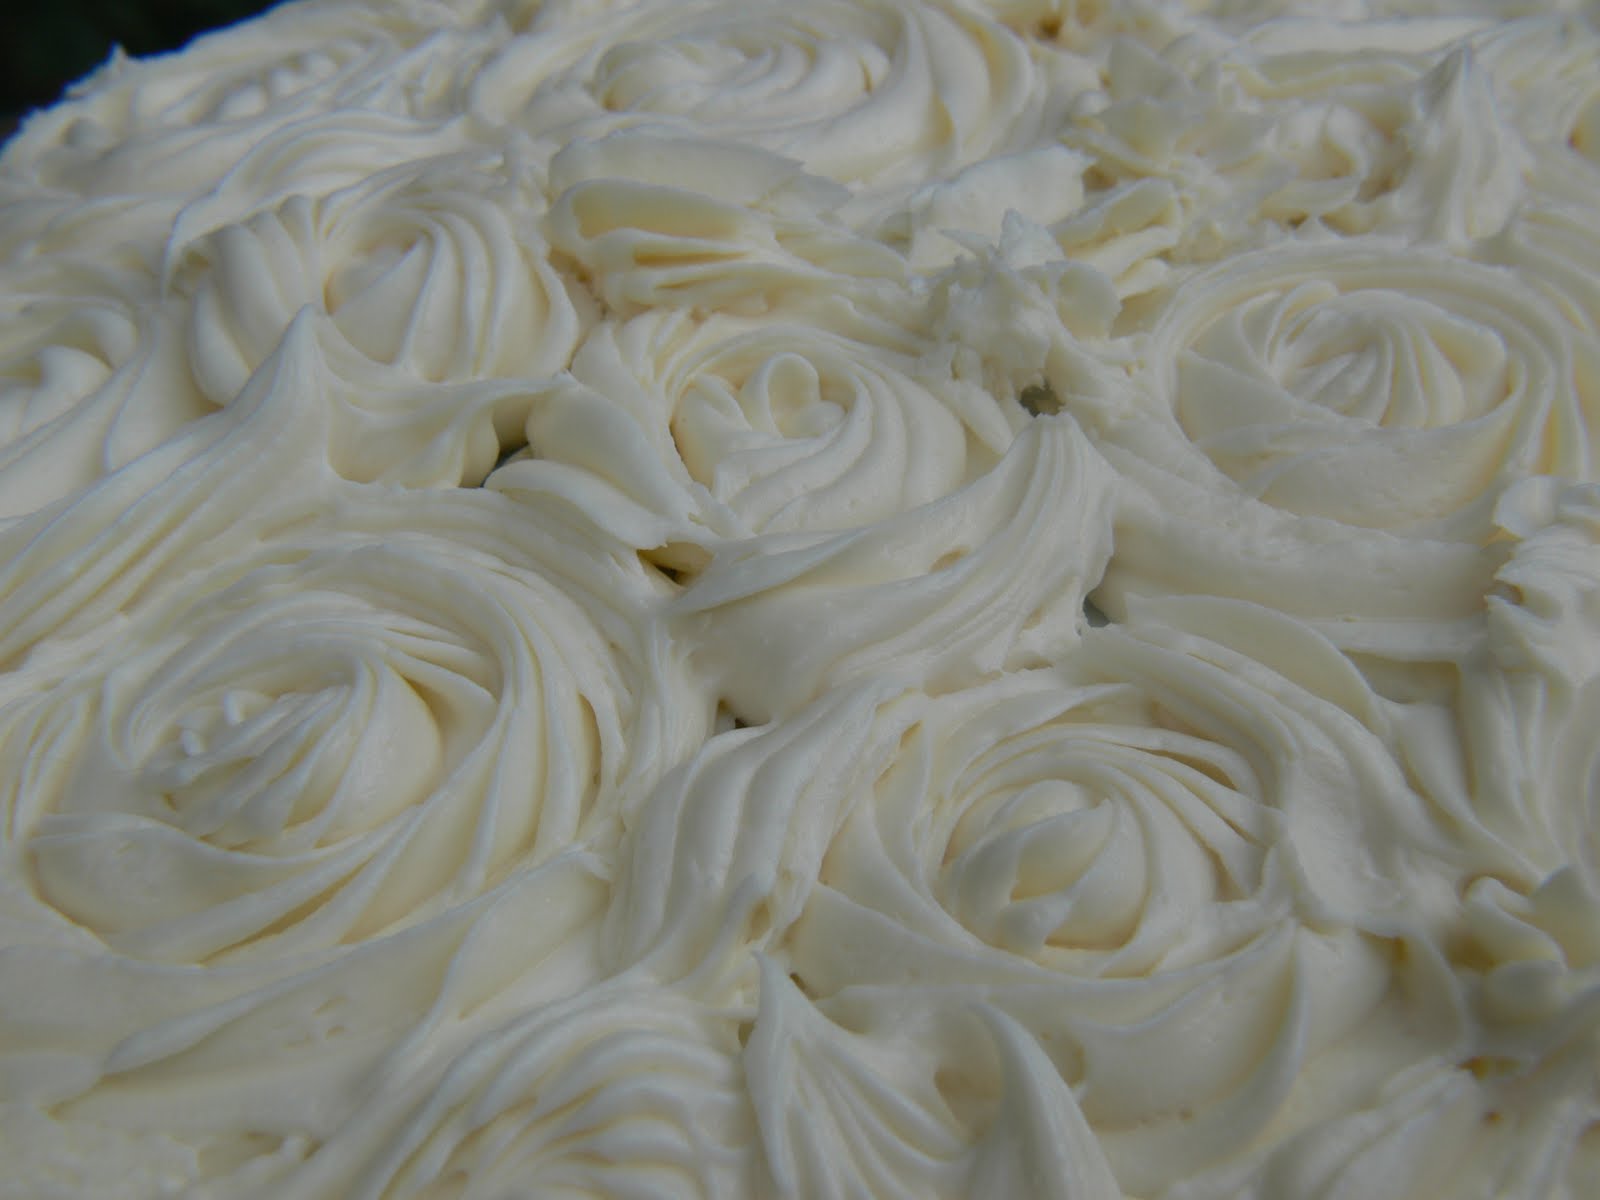
This cake looks way more complicated than it is. You just use a large star cake decorating tip and do swirls, starting in the center and working out. You put one here, here and there...wherever. Then you can fill in the gaps between them with little squirts of frosting. That part didn't turn out so well for me but I do like the roses.

I only did the top because the cake was too short and on a curved plate so it was nearly impossible to do the side.


But the real surprise was when you cut in to it. Hence my name, patriotic cake. It has been a few years since I've decorated a cake and it was a lot of fun! Turned out better than the last cake I made too.

Here's my past attempts at cake decorating:


This one was very small, it was for Isaac's first birthday.


This was actually the last one I did. The yellow and green were literally melting and I have no idea why...the other colors were fine. It was so ugly!

Ths was to celebrate Maria getting accepted into an art program for school.

Some turned out better than others but they were all fun to make. I do enjoy decorating cakes, no matter my lack of skill....I just don't like eating them so much.

Monday, May 23, 2011

peanut butter cup cookies

I love these cookies with a hidden trasure inside. I don't make them too often though since making cookies is more hands on than cookie bars. I like to slide something in the oven and work on other things while that's baking (I'm just too lazy about my baking). But it's certainly worth making every once in a while.


2 sticks butter
1 C. creamy peanut butter
1 C. light brown sugar
1 C. sugar
2 eggs
1 tsp vanilla
3 1/2 C. all purpose flour
1 tsp baking soda
1/2 tsp salt
1 bag of Reese's peanut butter cups (really you could use any fun size candy bars you felt like using)

Combine butter, peanut butter & sugars using an electric mixer on med. to low until fluffy.

Slowly add eggs & vanilla

Mix in flour, salt & baking soda.

Chill for 2-3 hours. Divide into 1 Tbsp pieces & flatten. Place pb cup in middle and roll into ball.

Wednesday, March 9, 2011

margharita pizza and raw brownies

Dinner...mmm. I'm so hungry right now that just thinking about it is making my stomach growl. Anyway, a couple of nights ago, we made dinner together. Adam had bought this log of fresh mozzerella and while we were snacking on it, I decided we needed to have a margharita pizza. It's our favorite kind, followed by hawaiian. After baking the crust, we topped it with a pizza sauce Adam made, chopped basil, pieces of tomato and small chunks of the fresh mozzerella. It doesn't melt very much like the hard blocks of mozzerella does. It was so good! Unfortunately, it didn't last very long. But the recipe made enough for 2 doughs so the other dough will be made into the same pizza in a night or two. Can't wait!


Then, for dessert, I made these raw brownies. I started making these when I was on the raw diet. I don't make them very often but they are good on occassion. They don't taste like brownies but they satisfy my sweet tooth.


It's a cup of dates, a cup of walnuts, a tsp. of cocnut oil (though you could sub butter, I'm sure) and 1/4 cup cocoa. You process it all in the food processor. The longer you proccess, the more dense they become. That's the way I prefer them. Then, you press into shape (I used a Ziploc container) and chill for an hour. Adam's never tried them.

Friday, January 14, 2011

Persimmon brownies and sumac salmon

So, I am still attempting to make more using my foraged goods. Here are two of my latest.

Persimmon brownies. Actually, they are more like spice cake but that's what they were called. I didn't really taste the persimmon in them. It was just a really moist spice cake which I enjoyed.

Here they are. They aren't ripe until they look like they're rotting. They're very mushy. If you eat them before they're ripe, they suck all the moisture right out of your mouth. A very bizzare sensation that I don't like! And in all honesty, I don't actually like the flavor when they are ripe either. I tried making a persimmon sauce, like cranberry sauce but it was gross so I threw it out! Like I said, I couldn't really taste the persimmons in this so I liked it. But since I don't like the flavor of these raw, I don't think I'll bother experimenting anymore with these.


Just in case you wondered, here's the recipe:


  1. 1. Cream butter and sugar together; add persimmon pulp, buttermilk and eggs.2. Then add dry ingredients and mix well.3. Pour into 10x12 baking dish and bake at 350 degrees for 45 minutes.
  2. Sumac is a berry that grows on upright bushes. They're a beautiful, deep red. They taste very similar to lemons. The white ones are poisonous though so beware. I ground them in the mortar and pestle but all the seeds stayed intact and try as I might, I couldn't sift them all out so one or two got into the dish. I have since learned that you need to pulverize them in the food processor.


Salmon goes well with lemon so I sprinkled a bunch onto some salmon filets and cooked that...no other ingredients. The juices from the salmon made it look like a red sauce had been poured over it. Simple and not too bad.


So there are a couple things I've been doing with the foods I gathered in the fall. More to come.

Wednesday, November 3, 2010

Apple Bacon Pie

As weird as this sounds, it sounded really good to me. So I went ahead and made it. I followed the recipe and it was really good! I would only use 4 apples next time instead of 6. It has been my breakfast every morning this week. This is the second time I've made pie crust. It's so easy, I had forgotten that.


Bacon Apple Pie

1 double pie crust recipe - home made or store bought
4-6 apples, peeled and sliced into 1/4 inch thick pieces
Lemon juice - about a tbs
3/4 lb of bacon, smokey and salty
1/3 cup white or brown sugar
1 tbs cinnamon plus other spices, if you would like
1/4 tsp salt
4 tbs butter

* Preheat oven to 350 degrees. Chop the bacon into 1/4 inch chunks and fry until quite done but not crispy. Remove from pan with a slotted spoon and drain on paper toweling. Reserve grease for another use.

*If using home made pastry lay half of it into a pie pan and roll out and then cut the other half into strips to use for lattice. If using store bought pastry defrost it completely and then turn one of the pans worth out onto a cutting board. Roll the pastry flat with a rolling pin and slice into strips for the lattice top.

* As you slice the apples toss them with lemon juice to keep them from browning. When you are ready to assemble the pie drain the apple of any extra lemon juice and then toss with the sugar, cinnamon and salt. Some recipes call for a tablespoon of flour to get tossed in here too. I don't use it but you might like it.

*Start to layer the apple slices into the bottom pie crust. When one layer of spiced apples is in sprinkle some of the bacon bits on top. Add another layer of apples, more bacon and then a third layer of apples and bacon. You can pile the apples quite high in this pie, tucking them in and laying them well to form a solid mound. Dot the top of the pile of apples with butter cut into pea sized pieces. Sprinkle some sharp cheddar cheese over this if you are being really decadent.

*Follow these instructions to create a lattice crust on top of the pile of apples. Crimp all the edges well and place the pie pan on a baking sheet and then place in the preheated oven. Bake for about 45 minutes or until the pie is very fragrant, you can see bubbly juice coming up through the lattice crust and the crust itself is nicely browned. Poke the pie with a knife to make sure the apples are tender then remove the pie and let it cool a bit. All pies are just as good at room temperature or cold and it will hold together better if you let it cool a bit. It will be worth the wait.

Saturday, June 5, 2010

Cinnamon rolls and double blessings

It all started last Sunday. I wasn't home from church long when Barry called and asked me to bring over the keys to Adam's car so he could move the Yukon which was parked over there. He told me that he had something for me from Anne, some one in the ward. So I walked over and handed him the keys and he told me that the thing he had for me was a big pickle crock. Anne's aunt had it and no longer wanted it. She was going to throw it away but since Anne had recently (3 months ago) been to my house and saw my butter churn crock in the dining room. She asked if she could take it to give to someone...that someone being me! I've never shared a picture of my butter churn either so here they are, my new crock collection. They're actually made by the same company and both in perfect condition, with lids. I have seen plenty of crocks in flea markets/antique stores but never with the original lid and even then, they are SUPER expensive. I paid $15 for the churn at a thrift store. Without the original lid, or often no lid at all, they go for anywhere from $60-100. $60 would be for one with a big crack that makes it unuseable. So, to thank Anne for the cool crock, I made some peanut butter buddy bars. I put some on a plate to take over and the rain started pouring down so I stayed home. The next day they were kind of hard and dry so I didn't take them over. I wanted to make cinnamon rolls anyway for her. I don't know why...but I just realy wanted it to be cinnamon rolls. So I tried each evening but other things got in the way. So today I decided I was doing it no matter what. Adam asked me to make a bunch since I don't make them very often at all so I did a double batch. It wouldn't have been so bad but I was making them in the little toaster oven so only one pan at a time could cook so I staggered the batches. As a result, I spent way too long in the kitchen today! Getting ready to go in... well, 2 were ready, 2 still required 30 minutes of rising. I used the recipe from the Better Homes and Garden cookbook. I've used it before. I wanted to use a different recipe but it would have taken even longer so I am SOOOOOO glad that I didn't. I used the icing recipe from that book too but it was disgusting. Luckily I tasted it before I put it on. So I used the icing recipe from my Amish cookbook. Nothing from that book has ever been bad. Yummy. Cinnamon rolls anyone??? I've got way too many and too sick from eating them all day to even want to think about them being here. I think I'll be freezing most of the rest. I took the rolls over to Anne's...just in time for desert, it turned out. I found out that her favorite foods are sweet bread and cinammon rolls. Her husband was just bringing in a few things from the garden and she offered me a tour of the garden so I took it. Her husband loaded me down with romaine lettuce, a couple cucumbers, a couple yellow squash and a handful of green beans. She said she'd call me when her tomatoes start turning ripe so I can come get some. She has a bunch of tomato plants but doesn't can any so she has to give what they don't eat away. I am a lucky girl, being so blessed. :o)

Thursday, November 5, 2009

Ooey, gooey goodness

I don't know if I was just in the right mood last night or if this was just especially good but whatever the reason, I loved it. I ate a bite fresh from the oven and it was gooey and oozed everywhere. I had to wait for it to cool off before I could actually get it out of the pan without it falling apart. I took some straight over to Barry and Lanette so I wouldn't eat it all. Yum, yum! I even had all of the ingredients on hand and I never have the ice cream topping but I think I was just meant to make these!

Caramel Chocolate Bars


1 1/2 cups brown sugar, firmly packed
2 cups quick oatmeal
1 (16 ounce) bag chocolate chips
3/4 cup caramel ice cream topping
1 1/4 cups margarine
2 cups flour, plus
3 tablespoons flour
1 teaspoon baking soda
1 teaspoon salt

Directions:
1. Preheat oven to 350°.
2. Cream brown sugar and margarine.
3. Add dry ingredients reserving 3 Tbsp of flour and stir in the oatmeal.
4. Press 1/2 of the mixture in the bottom of a greased 8 x 8 pan and bake for 10 minutes.
5. Sprinkle chocolate chips over crust.
6. Mix caramel topping with the reserved flour.
7. Drizzle this over the chips.
8. Sprinkle the top with the remaining crumb mixture.
9. Bake for an additional 15 minutes. (I had to bake for 20 minutes.)

Tuesday, October 27, 2009

A mess of food

Squash, Turnip Greens and White Bean Stew

(Pork chop shown is the recipe below)
I love turnip greens so when I saw this, it sounded really good to me...and it was really good. Very healthy and satisfying.

(I used frozen turnip greens with diced turnips and canned cannellini beans so it was fast and easy. I felt there was too much red pepper and cumin since I don't like things too spicy. I only used about half of each and it was still too spicy for my tastes so next time it will only have 1/4 of what it calls for.)
1 lb dried cannellini beans (soaked in 6 cups water overnight)
8 cups water
1/4 cup olive oil
1 head garlic, peeled
1 bay leaf
1 medium onion, chopped
4 garlic cloves, thinly sliced
2 teaspoons dried sage
2 teaspoons ground cumin
1/4 teaspoon red pepper flakes
3 lbs butternut squash, peeled, seeded and cubed
4 (10 ounce) cans chicken stock
1 lb turnip greens, torn into pieces (well rinsed)
salt and pepper

Directions:
1. Drain the soaked beans.
2. In a large saucepan, combine the beans, 8 cups water, 2 tbsps olive oil, the head of garlic and bay leaf.
3. Bring to boil and simmer, covered for 2 hours,or until the beans are tender.
4. Drain and discard bay leaf.
5. In the same saucepan heat remaining 2 tbsps olive oil.
6. Add onion and cook until tender.
7. Add sliced garlic, sage, cumin, and red pepper. Cook for 1 minute.
8. Add the squash, chicken broth, turnip greens and drained beans.
9. Bring to boiling, reduce heat and simmer, covered for 20 mins or until squash is tender.
10. Season with salt and pepper.
**********************************************

Parmesan Sage Pork Chops
Pork chops were on sale at a good price, hence the second pork chop recipe in a short period of time. This one turned out well too, nice and moist, not greasy.

1 1/2 cups breadcrumbs (I use Progresso garlic and herb)
1 cup grated parmesan cheese
1 tablespoon dried rubbed sage
1 lemon, rind of, teaspoon grated
2 large eggs, whisked
1/4 cup flour, seasoned with
salt and pepper
4 pork chops, about 1 inch thick (can use bone in or out ones)
1/8-1/4 cup butter
2 tablespoons olive oil

Directions:
1. preheat oven to 425F degrees.
2. Mix in bowl, bread crumbs, grated parmesan cheese, dried rubbed sage and grated lemon peel.
3. Then, on a plate put flour seasoned with salt and pepper; coat chops with flour.
4. Dip in egg.
5. Then dip in bread crumb mixture.
6. Melt butter and olive oil in a oven-proof skillet.
7. Brown chops until golden.
8. Transfer to oven and bake until meat thermometer says 150 degrees, about 20 minutes.
**************************************************

Fall Harvest Packets
Not really a recipe, just threw some stuff together and I liked it. I used hot sausage and it was a good contrast to the sweetness of everything else. It's not overly sweet though.

1 lb breakfast sausage
1/2 butternut squash, peeled and cubed
2-3 medium sweet potatoes, cubed
2-3 apples (sweet ones), cubed
1/4 cup maple syrup
1/4 orange juice
salt
pepper

1. Preheat oven to 350.
2. Mix the squash, potatoes and apples in a large bowl.
3. Mix maple syrup, orange juice, salt and pepper in a smaller bowl. Pour mixture over the squash mixture and toss to coat.
4. Tear off 4 sheets of foil.
5. Place 1/4 of the mixture in each foil packet.
6. Break up the sausage and put 1/4 on top of each packet.
7. Seal the 4 packets and place on a cookie sheet and slide into the oven (or on a grill).
8. Bake for about an hour or until squash is tender and sausage is done.
********************************************************

Chocolate Toffee Squares
Pic stolen from recipezaar. They are thicker than mine turned out to be, maybe because I didn't use an electric mixer, just me.


1 cup butter
1 cup light brown sugar, firmly packed
1 egg yolk
1 teaspoon vanilla
1/4 teaspoon salt
2 cups unsifted all-purpose flour
1 (6 ounce) package semi-sweet chocolate chips
3/4 cup coarsely chopped walnuts

Directions:
1. Preheat oven to 350 degrees.
2. Grease a 13x9x2 inch pan.
3. Beat butter and sugar until light and fluffy.
4. Add egg yolk, vanilla and salt.
5. Blend well.
6. Beat in flour just until combined.
7. Turn into prepared pan, spreading evenly.
8. Bake for 25 minutes or until golden brown.
9. Remove from oven and immediately sprinkle with chocolate chips.
10. When melted, spread and sprinkle with nuts.
11. Cut into squares while warm.
12. Let cool completely.
***************************************************************
Amaranth, Quinoa & Corn Chowder
I used carrots instead of leeks and I had to increase the cooking time for the grains.
3 tablespoons unsalted butter
1 1/2 cups finely chopped leeks (white and light green parts)
1 cup finely diced celery (peel celery before dicing if desired)
1/2 cup finely diced red bell pepper
1/4 teaspoon salt, plus more to taste
1/4 cup amaranth
1/2 cup ivory quinoa, thoroughly rinsed
1/4 teaspoon dried thyme
4 cups corn kernels (thawed if using frozen)
1 cup whole milk
2 tablespoons minced flat leaf parsley (optional)
Directions:
1. In a large, heavy pot, melt 2 tablespoons of the butter over medium-high heat. Stir in the leeks, celery, red bell pepper, and 1/4 teaspoon salt. Cook, stirring frequently, until the vegetable are soft, about 5 minutes.
2. Stir in the amaranth and 3 cups of water. Bring to a boil over high heat. Stir in the quinoa and thyme. Return to a boil. Reduce the heat slightly and cook at a gentle boil, partially covered, for 10 minutes. (I had to increase the cook time by 10-15 minutes and the grains were a still a little uncooked in the centers but almost done.)
3.Meanwhile, in a blender or food processor, puree 3 cups of the corn kernels with 1 cup of water. When the quinoa has cooked for 10 minutes, stir the corn puree and the remaining corn kernels into the soup. Add salt to taste. Reduce the heat and simmer until the quinoa and amaranth are tender, 3 to 5 more minutes. When the quinoa is done, there will be no starchy white dot in the center of each grain, and some of the germs' "tails" may unfurl and float freely. On close inspection, the amaranth will look like tiney opaque bubble floating on the surface.
4. Stir in the milk and remaining tablespoon of butter. Add more salt, if needed. Divide into portions and garnish each with a little parsley.
5. Note: The soup thickens on standing; thin as needed with additional milk, and add salt to taste.

Thursday, April 30, 2009

Chewy Double Chocolate Cookies

I made these cookies last night. I like to use the time that Adam isn't living with me to make things he doesn't like. He has never liked double chocolate cookies. I really like them so I was glad to have some. The recipe says that it makes 54 cookies and I knew I would never eat that many before they went bad so I made a few sheets full and froze the rest of the dough for later.


Chewy Double Chocolate Cookies

Ingredients
1 1/4 cups butter or margarine, softened
2 cups sugar
2 large eggs
2 teaspoons vanilla extract
2 cups all-purpose flour
3/4 cup cocoa
1 teaspoon baking soda
1/2 teaspoon salt
2 cups peanut butter chips or semi-sweet chocolate chips (12 oz. pkg.)

Directions

1. Heat oven to 350°.

2. In large mixer bowl; cream butter and sugar until light and fluffy.

3. Add eggs and vanilla; beat well.

4. Combine flour, cocoa, baking soda and salt; gradually blend into creamed mixture. Stir in peanut butter or chocolate chips.

5. Drop by teaspoonfuls onto ungreased cookie sheet. Bake 8-9 minutes. (Do not overbake; cookies will be soft. They will puff while baking and flatten while cooling.).

6. Cool slightly; remove from cookie sheet onto wire rack. Cool completely.

Monday, April 27, 2009

Meatloaf & Peanut Butter Pie

Well for some reason, I can no longer add pictures to my blogs. I hope that the ability comes back for me at some point but I will have to live without that for now. Bummer.

This is what I made while the Mendozas were here. The meatloaf is one of our favorites and we have it fairly often. I've never made it with the currant jelly but I have used blackberry jelly and I liked it. We don't usually have any jelly on it though.

Vegetable Stuffed Turkey Loaf

1 slightly beaten egg
1/2 cup fine dry breadcrumb
1/2 cup finely chopped onion (1 medium)
1/4 cup milk
1/2 teaspoon dried thyme, crushed
1/4 teaspoon dried rosemary, crushed
1/4 teaspoon garlic salt
1/4 teaspoon pepper
1 1/2 lbs ground turkey
1 cup chopped broccoli
2/3 cup shredded carrot
1/3 cup chopped sweet red pepper
2 tablespoons grated parmesan cheese
2 tablespoons currant jelly, melted

1. In a medium mixing bowl combine egg, bread crumbs, onion, milk, thyme rosemary, garlic salt, and pepper. Add turkey; mix well. On waxed paper pat turkey mixture into a 12x8-inch rectangle; set aside.

2. For vegetable stuffing, in a saucepn cook broccoli, carrots, and sweet pepper, covered, in a small amount of boiling water for 3 to 4 minutes or till crisp-tender. Drain well. Stir in Parmesan cheese.

3. Spread vegetable stuffing over turkey mixture to within 1 inch of sides. Beginning at a short end, roll turkey tightly using waxed paper to lift mixture. Peel waxed paper away as you roll. Place in a 9x5x3-inch loaf pan.

4. Bake in a 350 degree oven for 1 to 1-1/4 hours or till no longer pink (meat thermometer registers 180 degrees). Transfer to a serving platter; brush with melted jelly.

This pie is a recipe I found in a magazine ad. I don't usually like cream pies but I really like this one! This was the pie I was making when I burned my fingers while making homemade hot fudge.I liked it better with the homemade hot fudge but the store bought stuff is good too.

Decadent Peanut Butter Pie

1 prepared chocolate cookie pie crust
1 cup creamy peanut butter
8 oz. cream cheese (at room temperature)
12 oz container of non dairy whipped topping, divided (I use homemade whipped cream)
1 11.75 oz. jar hot fudge, divided
1/2 cup sugar
drizzle: 2 tbs. hot fudge and 2 tbs. creamy peanut butter

In a medium bowl, beat together peanut butter, cream cheese and sugar. Gently fold in 3 cups whipped topping. Spoon mixture into pie shell. Using a spatula, smooth mixture to edges of pie.

Reserving 2 tbs. of hot fudge, place remaining hot fudge into microwave safe bowl or glass measuring cup. Microwave for i minute, stir. Spread hot fudge over pie to cover peanut butter layer.

Refrigerate until serving time. Just before serving, spread the remaining whipped topping over the hot fudge layer, careful not to mix the two layers.

Place 2 tbs. hot fudge in a small baggie and knead for a few seconds. Cut a tiny hole in the corner of the bag and drizzle over pie. Do the same with 2 tbs. peanut butter going in the opposite direction of the hot fudge.

Tuesday, August 19, 2008

Blackberry Pie


Last summer,I went to a city South of Payson and picked Blackberries at a farm. I was planning on making jelly with them. I did make 2 pints of jelly and froze the rest. The jelly turned out well but I didn't process it correctly (it was my first time and I didn't finish reading the instructions before I began) so they stayed in the fridge instead of the cupboard.

SInce we're moving, I'm trying to use up some of our frozen food...the blackberries are one of them. Adam likes fruit pies and he's always been the one to make them before. He told me he was coming home for a couple of weeks to keep me company so I decided to throw a pie together for him. I pulled the pie shells out of the freezer only to find them broken and thoroughly freezer burnt. So I ended up making the pie filling and crust from scratch. The recipe I used didn't say to bake the crust before I filled it so I was really concerned about the bottom crust being completely soaked and soggy.


All in all, I think it turned out well. Adam said it was the best thing he's had in a long time. :o) And Mike and Mia, who spent the night that night, also thought it was great and it only lasted 24 hours.
Related Posts with Thumbnails